Quickstart
Let's get started! This guide will walk you through the basics of Phobos, from defining a simple pipeline template and executing it to creating a release.
Prerequisites
Before you begin, ensure you have the following:
- Phobos CLI
- Phobos UI
Phobos CLI
- Ensure you have the latest version of the Phobos CLI installed on your machine. If you don't have it, download it from the releases page.
- After installing the CLI, run
phobos configureto set up your endpoint and profile.
Logging into the Phobos CLI
phobos sso login
Phobos UI
- Ensure you have the latest version of the Phobos UI. If you don't have it, you can access the repository from GitLab.
In both the CLI and the UI, Phobos should be configured to the api endpoint, https://api.phobos.example.com, not the UI endpoint. If you have issues during the CLI login process or running the Phobos UI, confirm that you are using the api endpoint.
After successfully logging in via the CLI, you can update your profiles and endpoints by running phobos configure. Run phobos configure -h for more information.
Create a project
phobos project create -org-name "neutron" my-project
Note: Replace
neutronwith your organization name. If you don't have an organization, ask a system administrator to create one for you.
Define a pipeline template
Create a new file called pipeline.hcl with the following content:
Click to view the pipeline template
plugin exec {}

stage "test" {
  task "preliminary" {
    action "exec_command" {
      command = <<EOF
          echo "This action will run before the main task."
        EOF
    }
  }
}

stage "deploy" {
  task "main" {
    action "exec_command" {
      command = <<EOF
        echo "This is a command that will sleep for 10 seconds"
        sleep 10
      EOF
    }
  }
}

stage "cleanup" {
  task "final" {
    action "exec_command" {
      command = <<EOF
          echo "This action will only run if the previous action was successful."
          echo "The exit code of the deploy's main task was ${action_outputs.stage.deploy.task.main.action.exec_command.exit_code}."
        EOF
    }
  }
}
Let's break down the pipeline template:
-
The
pluginblock defines the plugin that will execute the pipeline. In this case, we're using theexecplugin, which simply executes a script. It's a built-in plugin that comes with Phobos. Eachpluginmust be defined in a separate block. -
The
stageblock defines a stage in the pipeline. It contains one or moretaskblocks. Eachtaskblock contains one or moreactionblocks. A stage is a logical grouping of tasks. In this example, we have three stages:test,deploy, andcleanup. -
The
taskblock defines a task in the pipeline. A task is a logical grouping of actions. In this example, we have one task in each stage:preliminary,main, andfinal. A task can have zero or more actions. -
The
actionblock defines an action in the pipeline. An action is a single unit of work. In this example, we have one action in each task:exec_command. An action can have zero or more outputs. -
The
exec_commandaction is used to execute a shell command. It takes a single argument,command, which is the command to execute. The output of this action is the exit code of the command. -
The
<<EOFsyntax is called a heredoc. It's a way to define multi-line strings in HCL. TheEOFat the end of the block is called the delimiter. It's used to mark the end of the heredoc. This is a common way to define multi-line shell commands. -
The
${action_outputs.stage.deploy.task.main.action.exec_command.exit_code}syntax is used to reference the output of theexec_commandaction in thedeploystage'smaintask. This is how you can pass data between actions in a pipeline.
Validate the pipeline template
Always validate your pipeline template before using it. This will ensure that the template doesn't contain any syntax errors among other things.
phobos pipeline validate
Note: If you're not in the same directory as the
pipeline.hclfile, you can specify the path to the file using the-directoryflag and optionally the-filenameflag to point to the file. You will have to be authenticated to a Phobos instance to run this command.
Create a pipeline from the template
Now that you have a valid pipeline template, you can create a pipeline from it.
phobos pipeline create -org-name "neutron" -type "runbook" -follow my-project
The pipeline details can be viewed in the Phobos UI within the Pipelines section of the project.
Replace neutron with your organization name and my-project with your project name. We are using the -follow flag to follow the pipeline's progress. If you don't want to follow the pipeline's progress, you can omit this flag.
The -type flag specifies the type of pipeline and is required. In this case, we're creating a runbook pipeline. Learn more about Pipelines.
Creating a release
Now let's create a release!
Create a versioned pipeline template
To create a release, we need a versioned copy of the pipeline template we just created.
phobos pipeline-template create -org-name neutron -project-name my_project -versioned -semantic-version 0.1.0 -name deploy
Note: You can also create a versioned pipeline template via the Phobos UI. Navigate to the Pipeline Templates section of the project and select New Pipeline Template. Fill in the required fields and click Create Pipeline Template.
Create a release lifecycle
Let's move to the UI to continue creating the release.
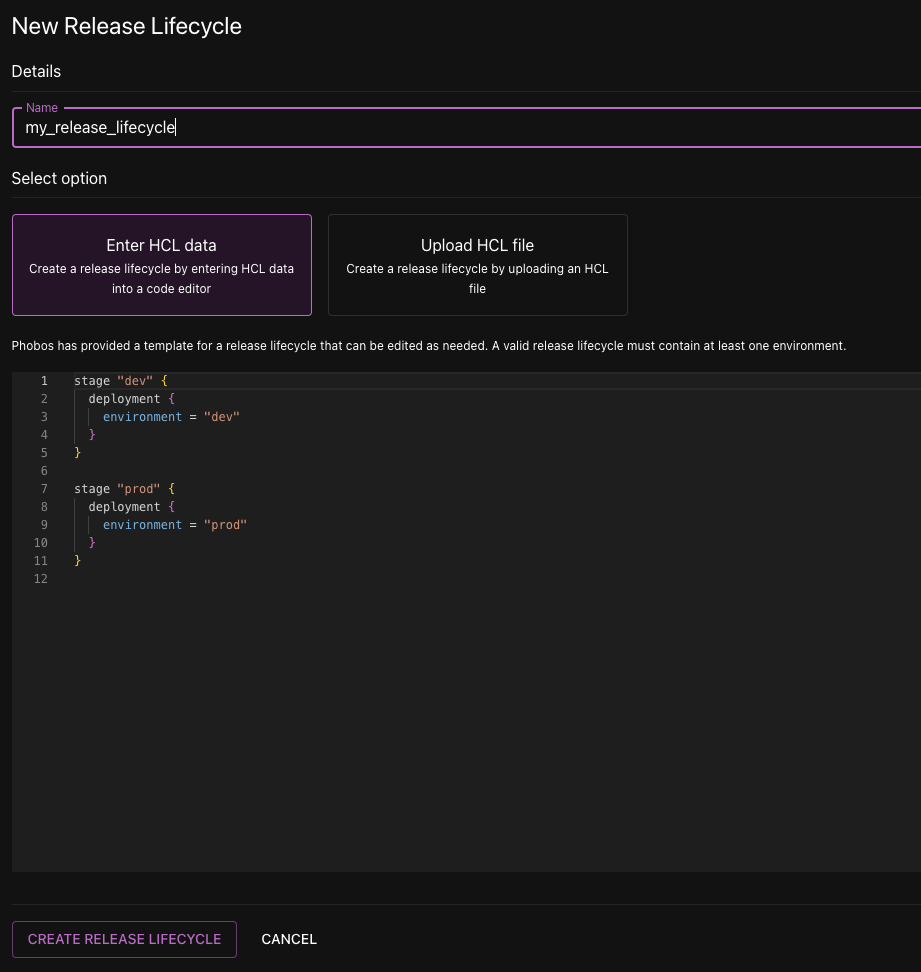
In the Phobos UI, navigate to your organization neutron and find your project my_project. Select Release Lifecycles from the project sidebar. Then select New Release Lifecycle to navigate to the new release lifecycle form.
On the New Release Lifecycle form, enter a name, my_release_lifecycle, for the release lifecycle. Select Enter HCL Data to use the sample release lifecycle provided by the editor, also shown here:
stage "dev" {
  deployment {
    environment = "dev"
  }
}

stage "prod" {
  deployment {
    environment = "prod"
  }
}
Then click Create Release Lifecycle.

Create a new release
Now we have the minimum requirements to create a release:
- A versioned pipeline template
- A release lifecycle
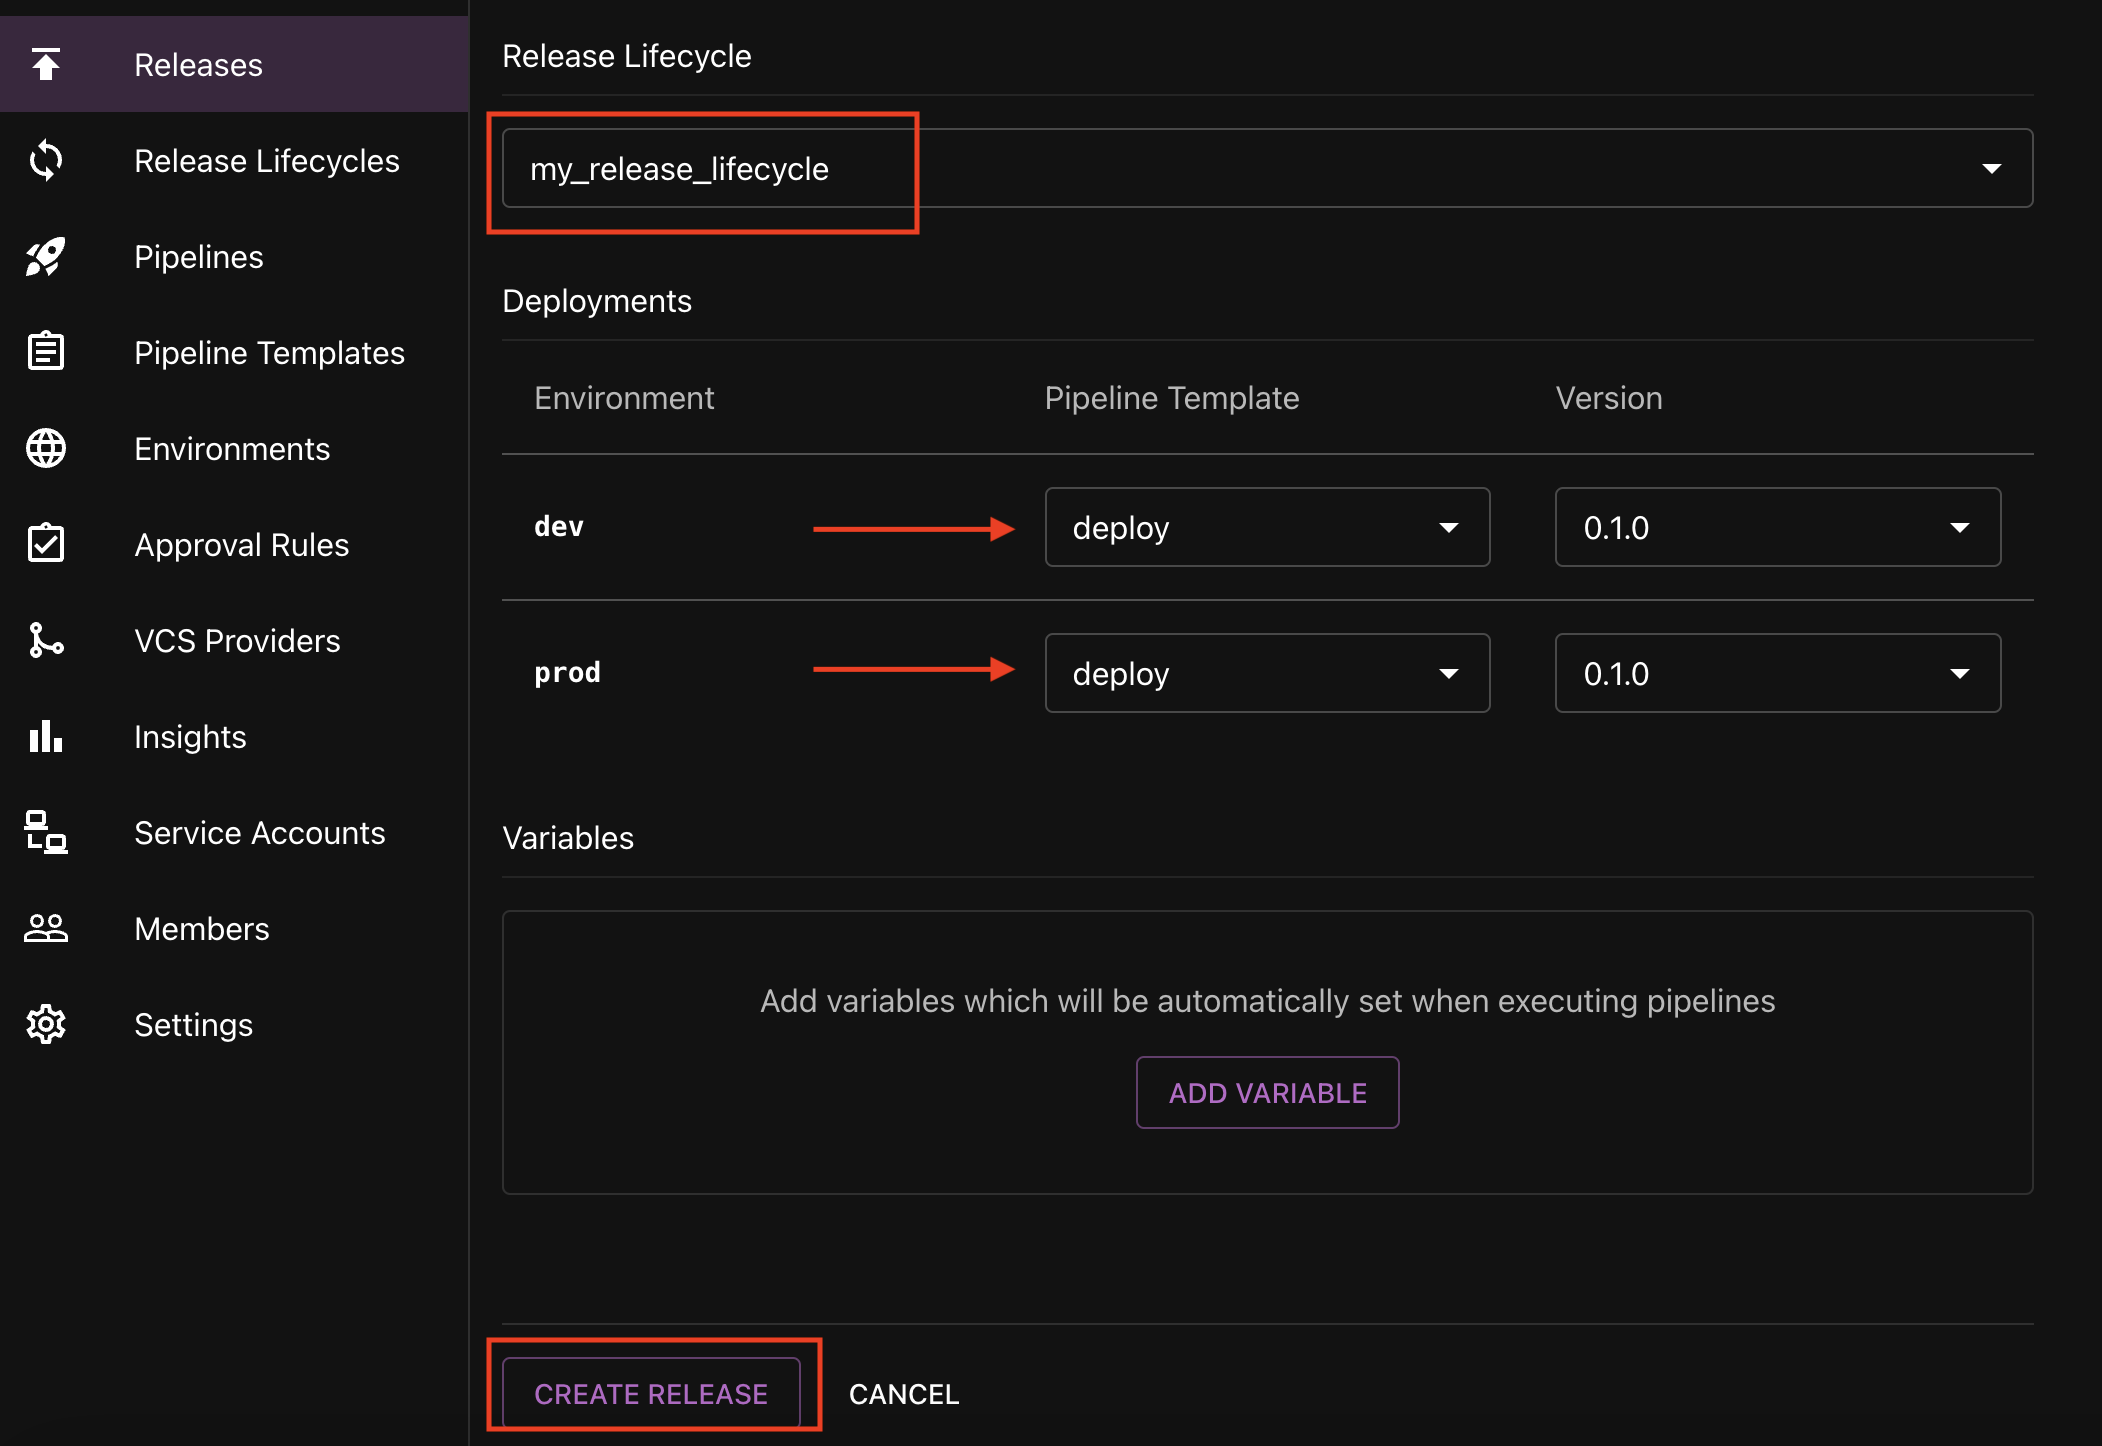
Navigate to the Releases section of the project and select New Release to go to the new release form.
On the New Release form, enter 0.1.0 as the semantic version.

Scroll down the form page to the Release Lifecycle dropdown and select my_release_lifecycle.
After selecting my_release_lifecycle, two deployments will generated in the Deployments section. For each deployment, select the pipeline template we created earlier, deploy. By default, the latest version will populate in the Version dropdown.
Click Create Release.

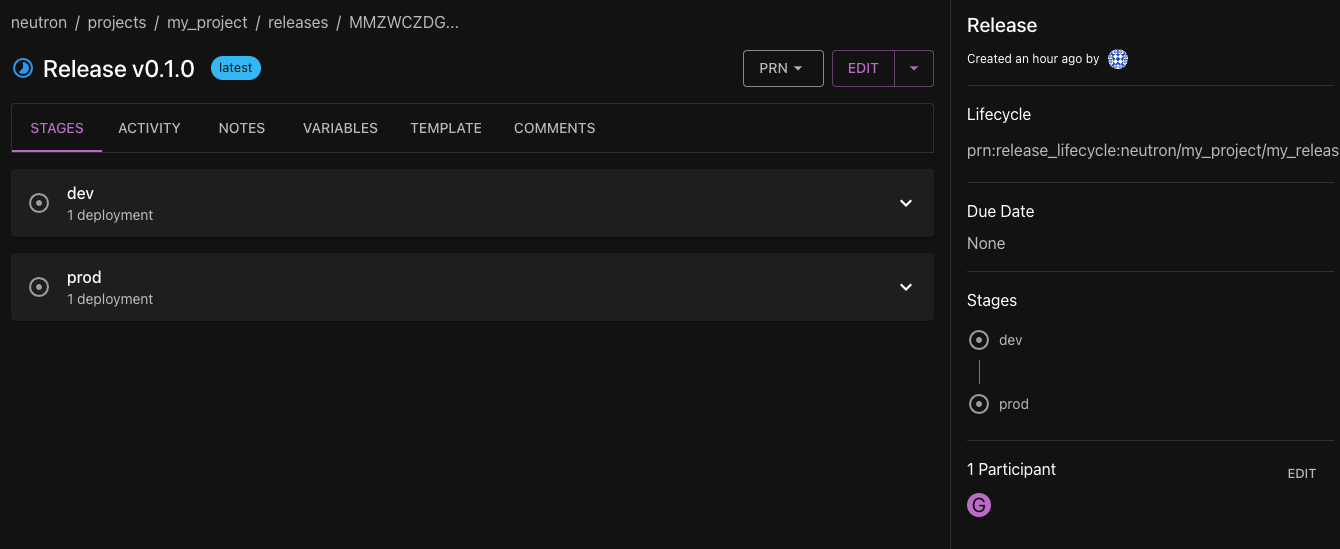
You'll be navigated to the release details page.
